This article kicks off a new subseries in which I’ll discuss a few tools at your disposal to write, validate, and run SQL statements. The first of the list is the Interactive SQL, better known as STRSQL.
Perhaps the most used (and certainly the oldest) tool to execute SQL statements is the green-screen Start Interactive SQL Session command, STRSQL. This command is somewhat similar to the QCMD command in the sense that it provides similar function keys.
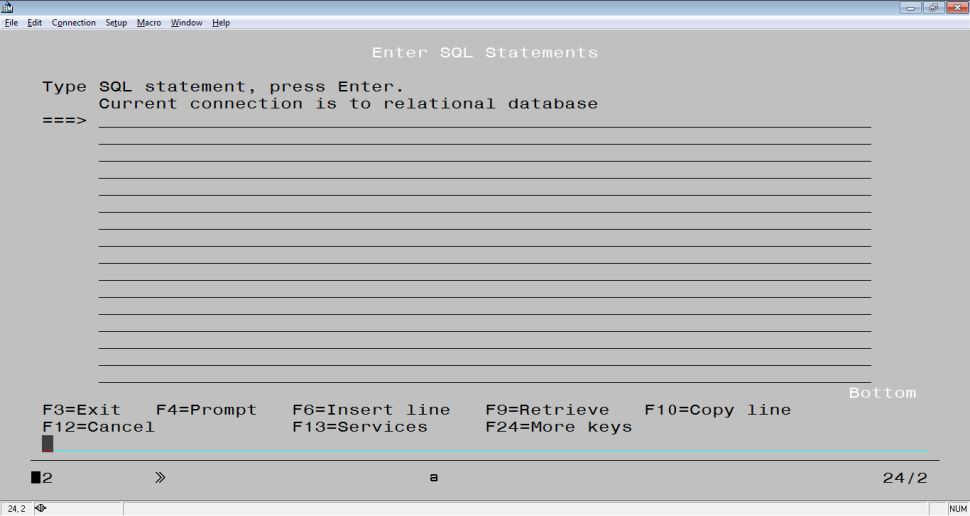
Before I start going into details, open a new 5250 session, log in, type STRSQL, and press Enter. You’ll see the Interactive SQL Session screen, similar to Figure 1.

Figure 1: First you’ll see the Interactive SQL Session (STRSQL) screen.
If you’ve used it before, you’ll find the latest statements at the top of the screen, like you would see in QCMD. You can press F9 to bring a statement down to the command line. If the list spans more than one page, you can use PageUp and PageDown to navigate it. Unfortunately, there’s no search option available.
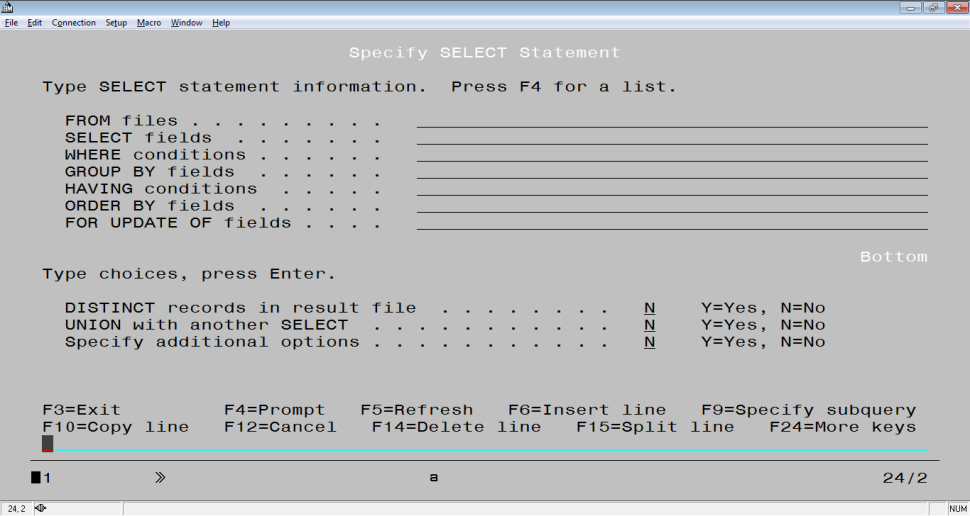
Type SELECT and press F4. You’ll see a prompt screen with the appropriate SELECT instruction parameters to fill, similar to Figure 2.

Figure 2: Prompt an empty SELECT statement.
You can use F4 to prompt each line of this screen and select an item from a list to fill the line, just like in a regular operating system command. However, in this case the “fields” and “conditions” prompts are only available after you have selected a file name. Now press F12 and type the following:
SELECT * FROM SYSCOLUMNS
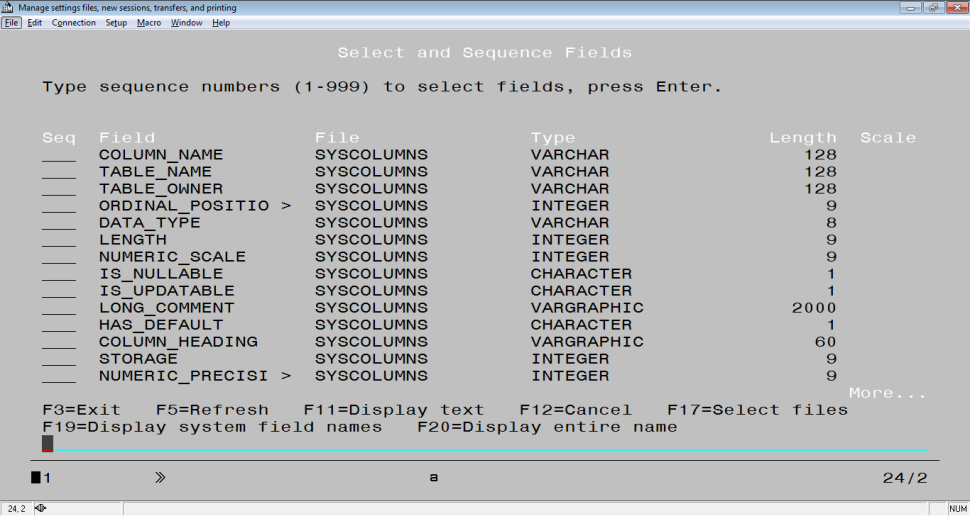
Press F4 and the “Specify SELECT statement” screen will be shown again, this time with some of the lines filled in. Figure 3 shows what you get when you prompt the “SELECT fields” line.

Figure 3: Prompting the “SELECT fields” line produces a list of available fields for the specified file.
Try selecting a few fields, using a different number between 1 and 999 for each field. When you press Enter, the fields you’ve selected will appear in the “Select fields” line (or lines, if you selected multiple fields), ordered using the numbers you typed for each field. This is particularly useful when you’re working with large files or files that have cryptic field names, because you can use F11 to toggle the information shown on the right side of the screen and see additional details about the fields. I use this a lot to select the fields I’m going to use to join files, by selecting the paired fields and then tweaking the resulting string. Let’s say I want to join two files using field_A1 from the first and field_B1 from the second. If I use the prompt functionality to select them, I get the “field_A1, fieldB1” string after selecting the fields and pressing Enter. Then I simply replace the comma with a blank space and an equals sign and get “field_A1 = field_B1.” OK, for simple relations, based on one key field, it might not pay off, but when you have to join two files with 10 or so key fields that have different names, it gets really useful.
As you’d expect, this is available in all SQL statements, providing contextual lists that greatly reduce the time you’ll spend looking for things. Now go back to the command-line screen with F12, and simply press F4 without typing anything. The prompt screen reappears, but it now shows a list of the SQL instructions you’re allowed to use. Some of them you already know, like SELECT and INSERT, but others are new, like CREATE TABLE (which I’ll talk about later).
Type a SELECT statement, place the cursor in a blank space somewhere in the statement, and press F15. See what happened there? The part of the statement to the right of the cursor is moved to a new line. If you press F6 instead, a blank line is inserted. These two function keys are particularly useful when you’re using a statement as a starting point to write another. For example, consider a simple statement like this:
SELECT * FROM InvMst
You can quickly transform this by splitting the statement after SELECT and inserting the column names in the new line:
SELECT
ItemID, WHID, ShelfID FROM InvMst
Similarly, you can delete a line by placing the cursor on the line and pressing the F14 function key.
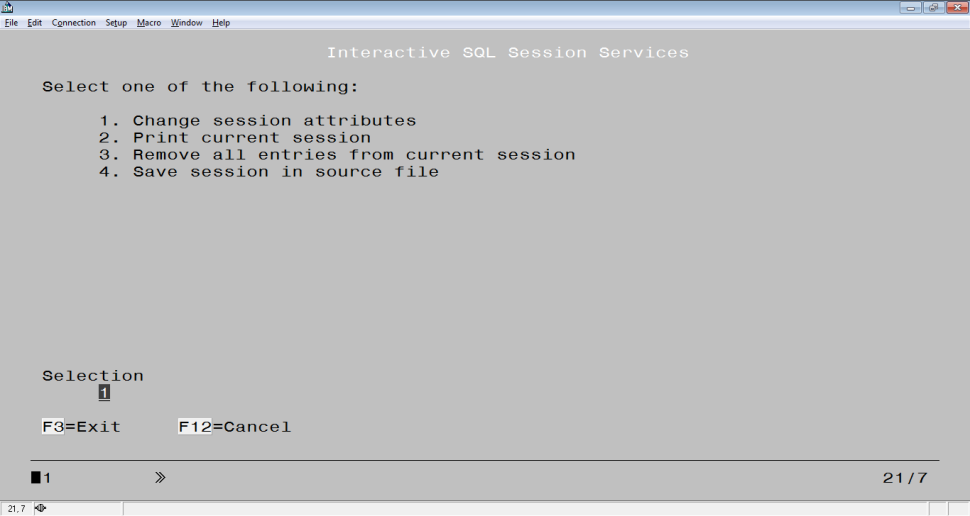
Another important function key is F13. It brings up the Services screen, shown in Figure 4.

Figure 4: This is the Interactive SQL Session Services screen.
I’ll explain option 1 in detail in the next TechTip, because there’s a lot to explain. For now, let’s have a look at the other ones. Option 2 sends the current history to a spool file, and option 3 clears the whole history. Option 4 is the most interesting, because it allows you to save the history to a file. Why is this important? Well, if you work with more than one session with the same user profile, you’ll end up with multiple session histories. If you use STRSQL heavily (and if you don’t yet, you soon will), losing track of the history means wasting precious time retyping awfully long statements. Being able to save them to a file will get really important really fast.
That’s all for now! The next article will continue to explore STRSQL, providing additional tips about this tool. La


 Business users want new applications now. Market and regulatory pressures require faster application updates and delivery into production. Your IBM i developers may be approaching retirement, and you see no sure way to fill their positions with experienced developers. In addition, you may be caught between maintaining your existing applications and the uncertainty of moving to something new.
 IT managers hoping to find new IBM i talent are discovering that the pool of experienced RPG programmers and operators or administrators with intimate knowledge of the operating system and the applications that run on it is small. This begs the question: How will you manage the platform that supports such a big part of your business? This guide offers strategies and software suggestions to help you plan IT staffing and resources and smooth the transition after your AS/400 talent retires. Read on to learn:
LATEST COMMENTS
MC Press Online