P stands for PHP, the programming language of LAMP.
Two earlier articles of this series (here and here) walked you through the first two videos from Catherine Gaughan-Smith's fantastic tutorial series on installing a virtual Ubuntu LAMP stack. The third video in her series walks you through configuring both PHP and MySQL. These are both relatively large, important steps that most of us green-screen folks have never even had to think about, so I'm going to devote one article to each step. Today, we focus on configuring PHP.
PHP: The ILE of the LAMP stack
Well, not really, since it's just one language. But it's very similar: on the IBM i, we write programs using ILE languages, and on Linux (and specifically in configurations based on the LAMP stack), we use PHP. If you're serious about learning about the world of LAMP stacks and web serving in the Linux world, you're going to have to become proficient with PHP.
One problem with learning PHP is having an environment to work with. You can find PHP hosts on the web or, as I just mentioned, you can even install PHP on the IBM i, but in those cases you are sort of at the mercy of whoever installed and is currently managing the PHP environment. In fact, that was one of the primary motivations for me for this entire series of articles: I wanted my own PHP environment that I could play with without having to worry about any limitations. At the same time, I didn't want to take a chance of blowing up my home machine, so until now PHP has been just sort of an intellectual curiosity for me. But once I realized that I could create a virtual machine that would entirely insulate my Windows environment from my Linux work, then suddenly PHP became a reality.
Back to the Tutorials!
And that brings us back to Catherine Gaughan-Smith's third video. In this 16-minute piece, Catherine walks you through the basic configuration of both PHP and MySQL on the virtual LAMP machine she helped you create in the first two videos. Today I'll guide you along the first ten and a half minutes, which focus solely on PHP. The rest of the video centers on MySQL and, since my path of using Eclipse PDT diverges quite sharply from hers, I'm going to leave that part of the tutorial to the next article.
The basic outline of the PHP portion consists of roughly eight parts. The first 30 seconds are a recap and a reintroduction to her Mac-based SSH terminal. She also mentions the PuTTY application for Windows, but if you've been following along, you know I use Eclipse PDT instead. I'll review that later. Continuing on with the video, she next uses the native Linux editor nano to create an introductory PHP page and show it in the browser via the Apache server. We'll do the same, but in PDT. Next, she creates an error page as part of a larger effort to improve PHP error reporting, which is especially important in a development environment. Catherine creates an error page, ending at the 3:00 mark, and then introduces you to the PHP configuration files, which takes you to 4:00. Next, she walks you through configuring the PHP environment using a custom configuration file. She uses nano, but as I explained in the previous article, we'll use the vi editor via the terminal view in PDT. Catherine then creates a log file in the standard Linux log folder, /var/log, taking you to the 7:00 mark. The next two minutes, to 9:00, focus on enabling some additional PHP files. The final portion of the video that I'll be concentrating on in this article, up to 10:30, simply shows the result of the error configuration that we did in the earlier steps. This leaves us with a working PHP environment that just needs a database to complete the installation.
Adapting to Our PDT Environment
If you've been working with these articles, you know that one of the biggest differences between Catherine's videos and my project is that, while Catherine works from tools on her Mac desktop, I instead use the Eclipse PHP Development Tools (PDT) as my IDE. The goal was to be able to do all my development work within a single platform-independent environment. PDT addresses those needs very well. And also, it's free, which is another project requirement. However, that means that in some places we have to do things a little differently, and this part of the article identifies where we diverge.
It starts pretty quickly. The first thing Catherine does is create an introductory page in PHP. Not exactly a Hello World page, the info.php page uses a standard PHP function to dump a whole bunch of very useful information about the PHP environment. Catherine uses her Mac-based SSH terminal program to do this, but we'll do it using PDT. These next steps are, in fact, one of the major reasons that I went in this direction. In a previous life, I spent a lot of time writing UNIX code and in so doing grew to really dislike the constant switching from one folder to another. UNIX experts can do this almost without thought, but not being a UNIX expert, I find myself flailing around from directory to directory using the cd and ls commands like a white cane to see where I am. So, the first thing Catherine does is change her current directory to one called /var/www/html. The Linux-literate will immediately recognize that folder, but for you and I it's just a bit of word salad. It turns out this tends to be the standard root of an Apache web server in Linux, and so is a well-known folder name. To me, it's sort of like knowing that QUSRWRK is the primary subsystem for many IBM i services or that QGPL is the default folder for temporary objects. In any event, if you plan to do web development from the command line in Linux, you'll want to remember that folder name because you'll be there all the time.
But I have a trick up my sleeve! I’m going to use PDT, and I'm going to create something called a filter, which will act as an easy shortcut for me to get to that folder and the files within it. Let's do that, shall we?
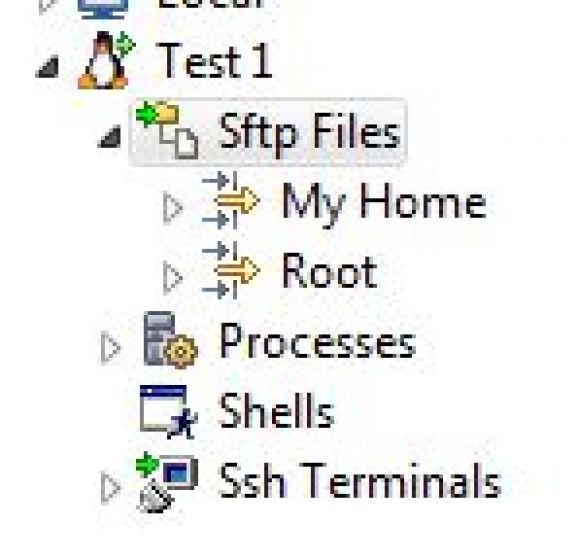
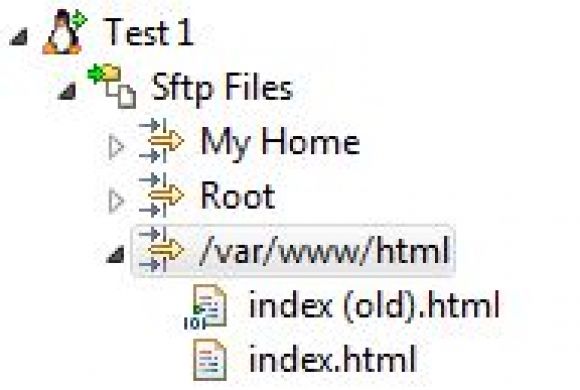
Figure 1: Expand the Sftp Files entry under your SSH connection.
From previous articles you should already have an SSH connection to your test machine, which in my case I called Test 1. Under that connection should be an entry for Sftp Files. If you have that, you can expand it and you'll see two default entries, one for My Home, which is the home directory for the user you used to log into the server, and Root, which is the root of the entire machine. You have access to all of this because you should have logged on with the administrator profile you created all the way back in the first article. Specifically in the article on Apache, we used this technique to drill all the way down into the /var/www/html folder to create a new index.html page.
We could do that again, but if you recall, it was a little cumbersome. Instead, we want to be able to get to the /var/www/html folder quickly. To do that, we create a filter.
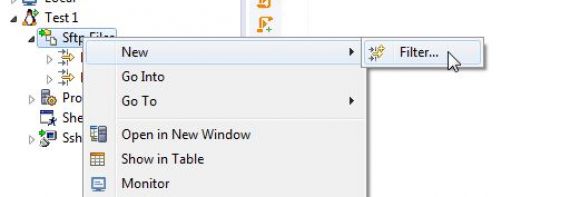
Figure 2: Create a filter using the context (right-click) menu from the Sftp Files object.
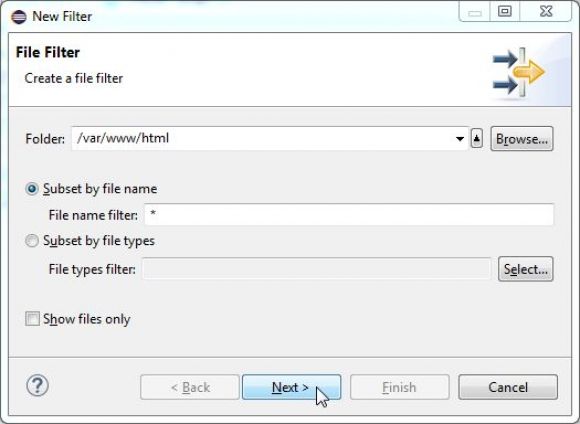
Figure 3: Enter the folder name /var/www/html and leave the rest of the defaults.
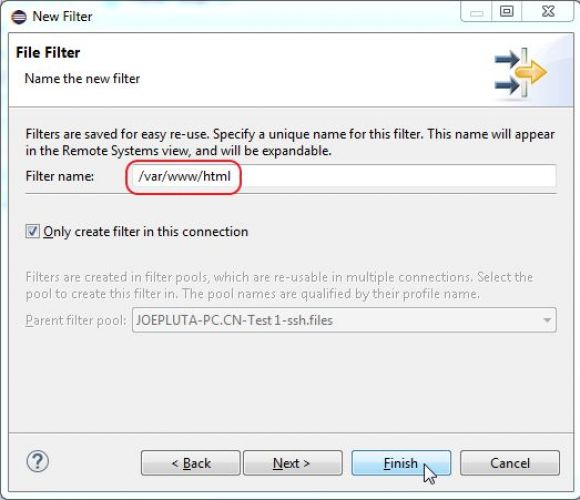
Figure 4: You may want to override the default with something more meaningful.
It's straightforward. Right-click on the Sftp Files object and select New > Filter… from the context menu. On the first dialog, enter the fully qualified name of the folder you want to access, and hit Next. The second dialog will default the filter's name to the last folder in your fully qualified name (that is, for /var/www/html, the default filter name will be html). I prefer to use the fully qualified name in the cases where there are conflicts, or you could use something meaningful like "Apache HTML folder." It's up to you. But once you hit Finish, you'll now have a shortcut. And if you expand that entry, you should see two files: index.html and index (old).html.
Figure 5: Expanding the filter shows the index.html we created and the index (old).html we renamed.
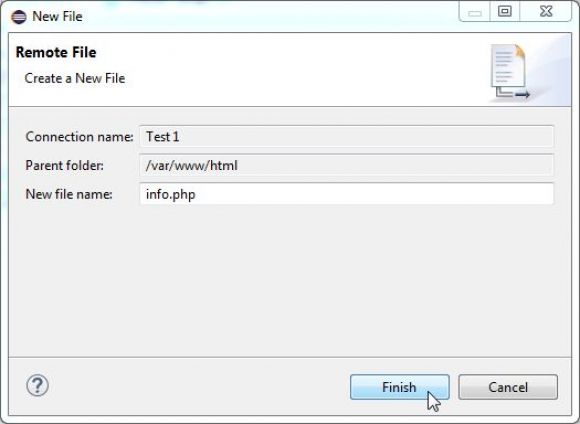
So starting at about 0:30 in the video, Catherine changes her current directory to the /var/www/html directory and then invokes nano to create the new file. You can bypass all that by simply right-clicking on the filter you created and selecting New > File….
Figure 6: Use New > File… to bring up the New File dialog, and enter the file name info.php.
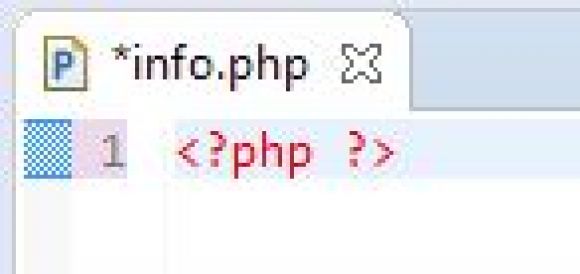
This will create a new file named info.php, which you can then double-click on to bring up the PHP editor. The nice thing is that you are automatically placed into the PHP editor, and as soon as you type <?, the editor knows you're doing a PHP command and auto-completes the entire angle keyword .
Figure 7: The PHP editor will auto-complete the PHP tag as soon as you type <?.
Now just finish typing in the phpinfo(); call. Note that if double-clicking doesn't automatically bring up the PHP editor, you may need to force it the first time by using the context menu. Right-click on info.php and select Open With > PHP Editor to bring up the PHP editor. Once that's done, you'll be in the PHP editor.
Figure 8: Finish the code, hit Ctrl+S to save, and you're done!
The point is that not only can you get to the files quickly, but you also have a PHP-aware editor available to you. I think it's well worth the effort of diverging from Catherine's otherwise fantastic tutorial. In the next section, you'll use the same technique to create the errors.php page. Once again, you'll be in the PHP editor, which will help you with lots of auto-correct as you type in the simple PHP page.
Next, you switch back to the terminal view. Remember, this is just another window in PDT; you never leave the IDE. Follow along with her instructions right up until roughly the 3:55 mark, where she uses the sudoedit command to create a new file, custom.ini.
Ubuntu is very picky about not allowing you to edit configuration files, much the same way that you can't do certain things on the IBM i without special permissions. I could fix that by using the Linux version of permissions (the chmod command), but for now I'm just going to continue to do it using the more brute force method of using vi in the terminal. Although vi is not a very friendly editor, since editing configuration files is not something you should do casually, I think this is a reasonable compromise. When we move to more advanced Linux configuration, I may use a different technique.
Anyway, instead of sudoedit nano mods-available/custom.ini, you'll use the command sudo vi mods-available/custom.ini and then use the vi editor to enter the configuration. After that, you can then continue to follow her instructions all the way to the 10:30 point, which encompasses the entirety of the PHP configuration. You've now successfully installed and configured PHP and are ready to move on to MySQL!
And while MySQL will have to wait until the next article, you are free to move ahead with PHP. Feel free to find any PHP tutorial information, such as the ones I pointed to earlier, and use the PDT editor to create PHP files to your heart's content. This should give you plenty of opportunity to learn PHP basics until our next article. Enjoy!




 Business users want new applications now. Market and regulatory pressures require faster application updates and delivery into production. Your IBM i developers may be approaching retirement, and you see no sure way to fill their positions with experienced developers. In addition, you may be caught between maintaining your existing applications and the uncertainty of moving to something new.
 IT managers hoping to find new IBM i talent are discovering that the pool of experienced RPG programmers and operators or administrators with intimate knowledge of the operating system and the applications that run on it is small. This begs the question: How will you manage the platform that supports such a big part of your business? This guide offers strategies and software suggestions to help you plan IT staffing and resources and smooth the transition after your AS/400 talent retires. Read on to learn:
LATEST COMMENTS
MC Press Online