Here’s a reusable reference for connecting your SSIS to your IBM and Microsoft databases.
I’ve been introducing the Microsoft SSIS technologies to the IBM community, who is showing interest, and I would like to continue providing more. Modular programming is always a good thing, so I’m going to try to reduce the initial data source configuration overhead in my articles by creating this reusable, modular article that is the starting point for any SSIS packages using databases.
In subsequent articles, I will be referring back to this article, which contains the basic database connection source configurations with the following list of additional reference articles to getting started:
SQL Server Integration Services
- Easily Create Excel Spreadsheets from Your IBM i Using SSIS
- Simplify Common Database Operations, Including ETL, with a Few Point-and-Clicks
- Getting Started with Microsoft Visual Studio Express
In Easily Create Excel Spreadsheets from Your IBM i Using SSIS, I showed you how to connect your SSIS to DB2. Please refer back to that article for further details, so we can focus on connecting an SSIS package to both a DB2 database and a Microsoft SQL database to get data from the DB2 sent to the Microsoft SQL database.
This process, which can be run daily as a scheduled task, will be a simple query to retrieve all active users.
Simple Specifications for Our First DB2 File Export
Reusing the details from previous articles, we'll simply be exporting a user file that will export only active members and will run daily. The file will have a simple DDS as follows, where the active members have the JRSTATUS field set to either "A" or "Y."
* FILE: JR_USER - SIMPLE MEMBER USER FILE
A R JRUSER
A JRUSERKEY 6S 0
A JRFNAME 32A
A JRLNAME 32A
A JRMI 1A
A JRSTATUS 1A
We'll seed the initial data to look as follows. Note that I have attached the DDL and DML source code for download for easy setup of this example.

Figure 1: Here's the initial sample data in the source DB2 database created from DML.
Source and Destination Databases
To refresh the data warehouse, we simply run a SELECT query from the source DB2 database and insert that data into the destination data warehouse, which for this example will be a Microsoft SQL database.
Source database: DB2
Destination database: Microsoft SQL Server (Data Warehouse)
Connecting SSIS to DB2 with ODBC
Assuming you already installed the ODBC driver from my previous article, we can configure ODBC to your system. Select a Data source name that you'll be able to identify when referencing it, and select your system.
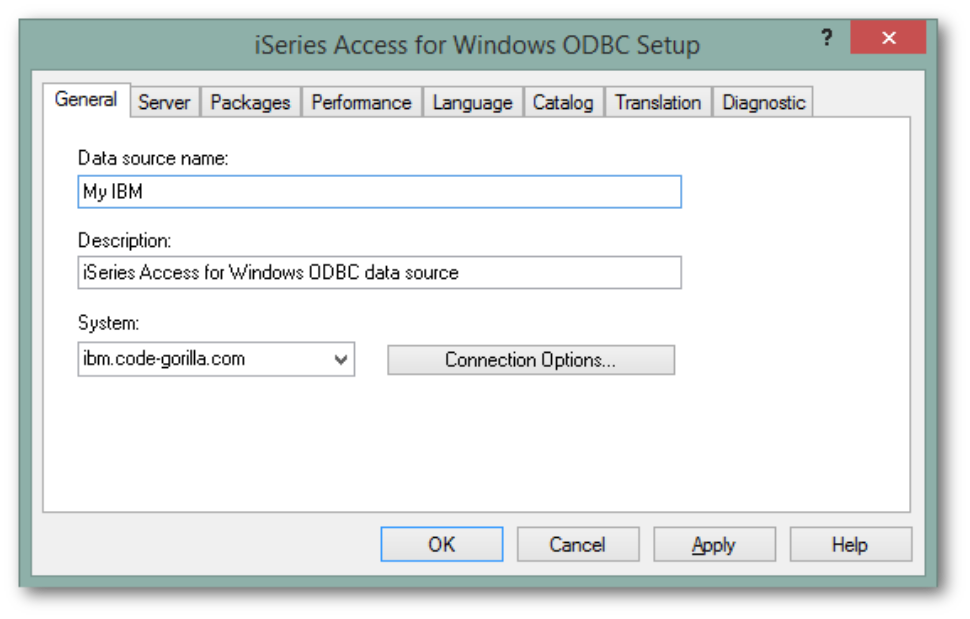
Figure 2: Set up ODBC for your server.
Note: You may want to go into the Server and Packages tabs to set your default library.
Building the SSIS
To begin creating our SSIS:
- Open Visual Studio.
- Select File > New Project…
- Select Templates > Business Intelligence > Integration Services Project.
- Enter the name for your project, and select the directory location to be created.
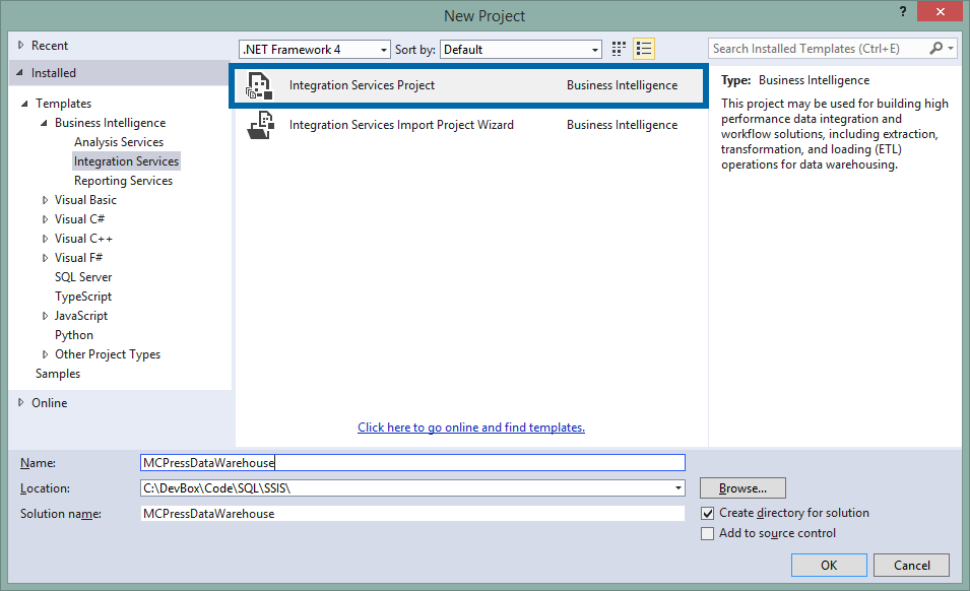
Figure 3: Select the Integration Services Project for the SSIS project.
Source and Destination Connection Managers
With the new project created, we now need to add the source and destination of our project. We'll be pulling data from a DB2 Database source and writing the data to a Microsoft SQL Database destination. These are specified in the SSIS package using connection managers.
Source Connection Manager—DB2 Database
To create our database source connection manager, go to the bottom panel labeled Connection Managers, right-click, and select New Connection…
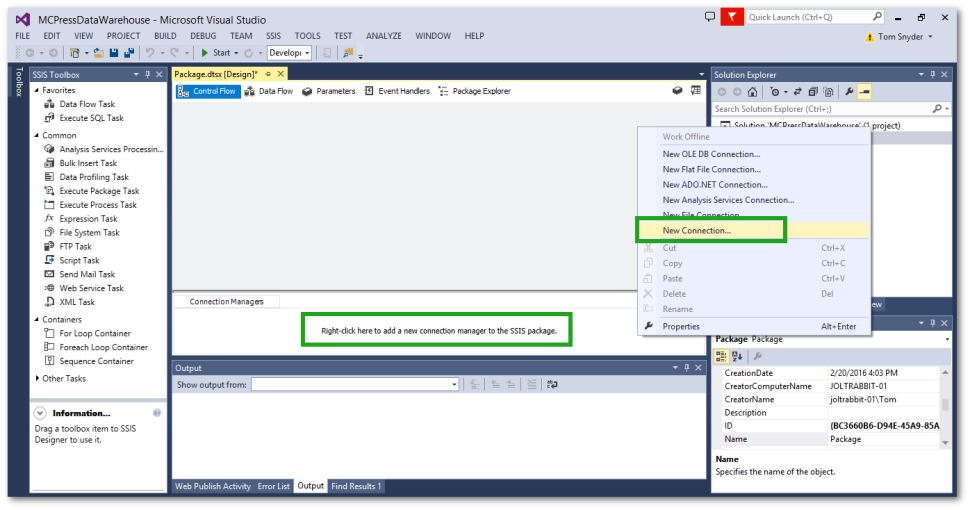
Figure 4: Create a new connection for DB2 source connection.
When you select the New Connection… option, the following screen will allow you to choose ODBC.
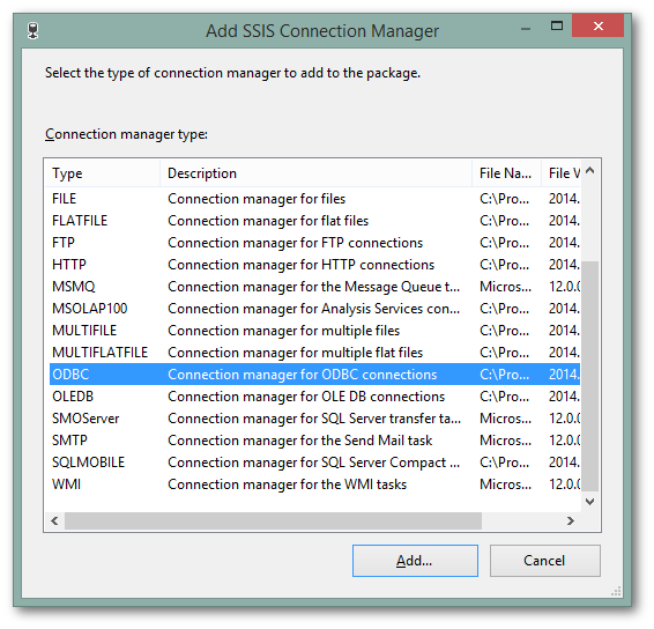
Figure 5: Use ODBC with DB2 Connection Manager.
When you select ODBC, you'll see your data source listed in the dropdown box for selection. Here, you will also provide the user name and password.
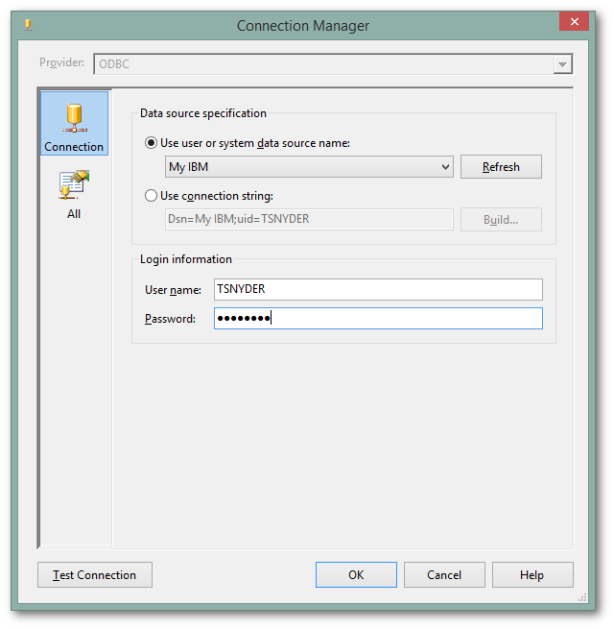
Figure 6: Provide login information for the ODBC DB2 connection.
When you're specifying your database details, it's not a bad idea to click on the Test Connection button to ensure that you have your information entered correctly and that your authentication method is working so that you won't have to troubleshoot your SSIS package when/if you have a connection problem.
Destination Connection Manager—Microsoft SQL Database (Data Warehouse)
To create our database source connection manager, right-click in the Connection Manager panel again, and select "New OLE DB Connection…"
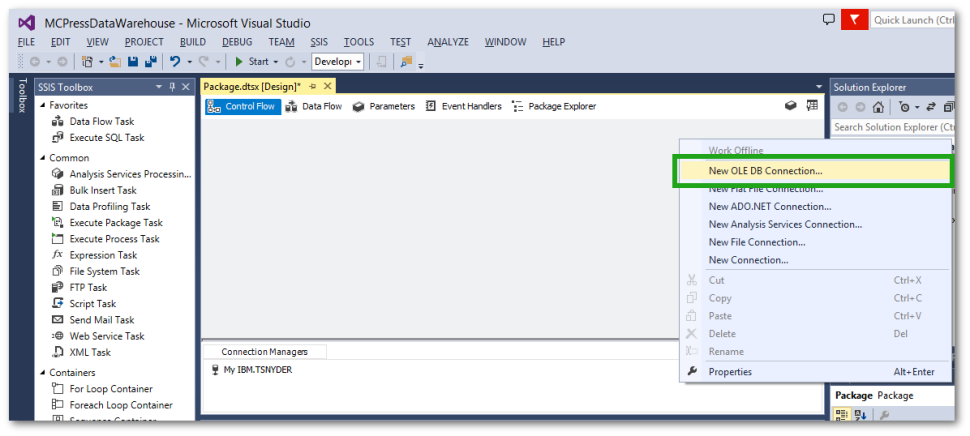
Figure 7: Here's the new Microsoft SQL OLE DB connection.
When you select the "New OLE DB Connection…" option for the first time, the following screen, "Configure OLE DB Connection Manager," will be blank. You’ll need to click on the "New…" button on the bottom of the screen to specify your database information:
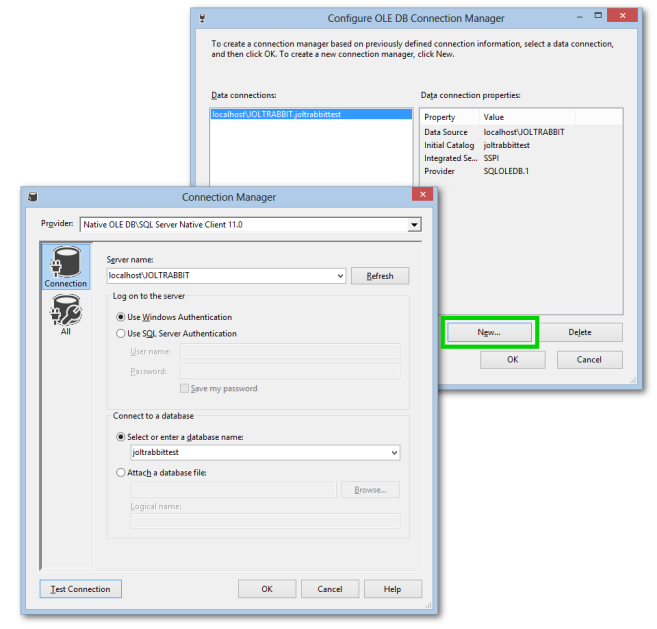
Figure 8: Provide login information for the Microsoft SQL connection.
Set up your connection manager using the following settings, making changes for your machine if needed:
|
Property |
Value |
|
Provider |
Native OLE DB\SQL Server Native Client 11.0 |
|
Server Name |
Localhost\JOLTRABBIT (your server name) |
|
Log on to the server |
Use Windows Authentication |
|
Enter a database name |
joltrabbittest |
There are numerous ways that this could be set up. I'm merely walking you through one possible setup that will work with the previous articles that have been mentioned. You'll likely choose other options when you become familiar with it.
Preparation Complete
It seems like a lot of words and pictures, but if you actually work through this project, you’ll see that the above steps are very simple. You simply right-click the connections area and assign the properties for the connections.
I plan on using this article like a COPY file for all my future SSIS articles using databases. It’s a good cookbook reference for any SSIS development.
Catch you next time, when we start talking about data warehouses, which will be the first subsequent article to reuse this c


 Business users want new applications now. Market and regulatory pressures require faster application updates and delivery into production. Your IBM i developers may be approaching retirement, and you see no sure way to fill their positions with experienced developers. In addition, you may be caught between maintaining your existing applications and the uncertainty of moving to something new.
 IT managers hoping to find new IBM i talent are discovering that the pool of experienced RPG programmers and operators or administrators with intimate knowledge of the operating system and the applications that run on it is small. This begs the question: How will you manage the platform that supports such a big part of your business? This guide offers strategies and software suggestions to help you plan IT staffing and resources and smooth the transition after your AS/400 talent retires. Read on to learn:
LATEST COMMENTS
MC Press Online