Have you noticed the ever-increasing buzz around the EJB3 specification? Personally, I am very excited that this new attempt to standardize the Java persistence programming model is gaining momentum. It seems that finally the J2EE architects got that part of the specification right. In previous versions, the EJB spec was so complex that many developers simply didn't have time to read and understand it. EJB3 and its core element, Java Persistence API (JPA), reestablish the sanity in the world of enterprise Java development.
EJB3 is not just a programming API. It is a new paradigm that rests on Plain Old Java Objects (POJOs), Java annotations, and the dependency injection design pattern. With EJB3, you can create well-performing, high-quality applications faster and at a lower cost. So, did you know that you can learn, explore, and implement this technology on System i? In this TechTip, I show you how to install and set up open-source application server JBoss on System i. I also cover the steps necessary to deploy the sample EJB3Trail application, which constitutes an excellent EJB3 tutorial.
Software Prerequisites
Although I could use the System i classic 64-bit JVM to install JBoss, I decided to leverage the powerful, new 32-bit IBM Technology for Java JVM, often called J9. The IBM J9 JVM is available on i5/OS V5R4M0 as 5722-JV1, Option 8, and is compliant with JSE Version 5. The sample application uses DB2 for i5/OS to persist data. For maximum server stability, I strongly recommend that you install the latest cumulative PTF (SF99540) and database group PTF (SF99504) on your System i machine. In addition, you need to load the PTF MF41385.
I downloaded the JBoss application server installer (jems-installer-1.2.0.GA) and the EJB3Trail sample application from the JBoss Web site. To take advantage of the EJB3 support, you must download the installer rather than the application server. You'll also need X-Windows-capable software—such as Hummingbird's Exceed or VNC—to properly render the installer's GUI on your workstation. This is needed only for the installation.
Installation
The installation process is pretty straightforward. I focus only on the steps that are specific to System i, such as integration with DB2 for i5/OS:
Step 1: Enable the J9 JVM
On System i, create in your IFS home directory (such as /home/Jarek) a file called .profile. You can use the EDTF command to edit this file. For example:
Add the following shell commands to the .profile file:
export JAVA_HOME
From an i5/OS command prompt, start QShell using the STRQSH command. Verify that the J9 is enabled by typing the following command:
java –version
The JVM should produce messages similar to the ones shown below:
Java(TM) 2 Runtime Environment, Standard Edition (build jclap32dev)
IBM J9 VM (build 2.3, J2RE 1.5.0 IBM J9 2.3 OS400 ppc-32 j9vmap3223-20061001 (JIT enabled)
J9VM - 20060915_08260_bHdSMR
JIT - 20060908_1811_r8
GC - 20060906_AA)
JCL - jclap32dev
Step 2: Set Up the TCP/IP Host Table Entries
Use the CFGTCP command, Option 10, to add LOCALHOST and IIOP as the aliases for the local machine. These aliases are used by the JBoss application server. For example:
Address Name
192.168.100.1 MYI5
MYI5.BSEISV.IBM.COM
127.0.0.1 LOOPBACK
LOCALHOST
IIOP
Step 3: Set Up the SQL Schema
Although this step is optional, I recommend that you create a separate DB2 schema (SQL collection) for the sample application. Using either the iSeries Navigator's Run SQL Script utility or the interactive SQL session, run the following SQL statement:
Step 4: Install JBoss Application Server
Copy the installer file jems-installer-1.2.0.jar to an IFS directory on System—for example, /opt.
Start the X-Windows server such as Exceed on your workstation.
From an i5/OS command prompt, start QShell and execute the following command to export the display to enable the connectivity to the X-Windows server now running on your workstation:
Here, jarek.bseisv.ibm.com is the host name of the workstation. Use the host name appropriate for your network configuration. You can also use the IP address of the workstation in place of the host name.
Still in QShell, change the directory to /opt and type the following command:
The dialog shown in Figure 1 should appear on your workstation:
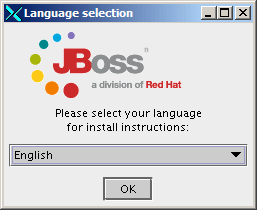
Figure 1: The language selection dialog will appear. (Click images to enlarge.)
Click OK to continue. The Jems dialog appears. Click Next. The next dialog shows the JBoss Release Notes. Click Next. The License Agreement dialog is displayed. Read the agreement and click the radio button to accept it. Click Next. The dialog that appears allows you to change the installation path. Change it to /opt/jboss-4.0.5.GA as shown in Figure 2.
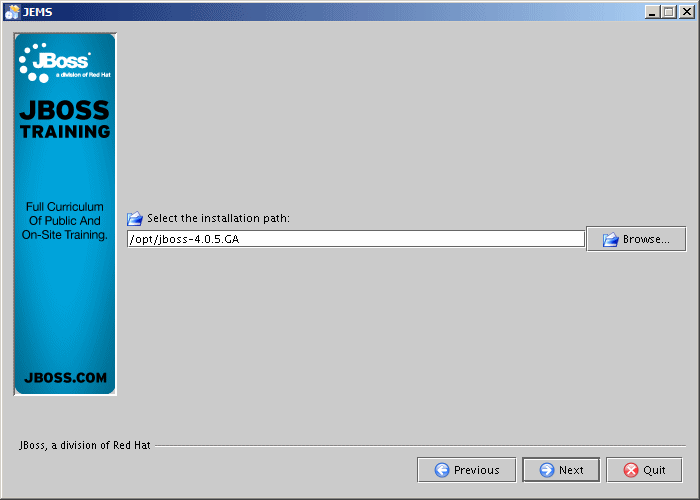
Figure 2: Select the installation path.
Click Next to navigate to the dialog that allows you to specify the installation type. Make sure that you change the default to ejb3 as shown in Figure 3.
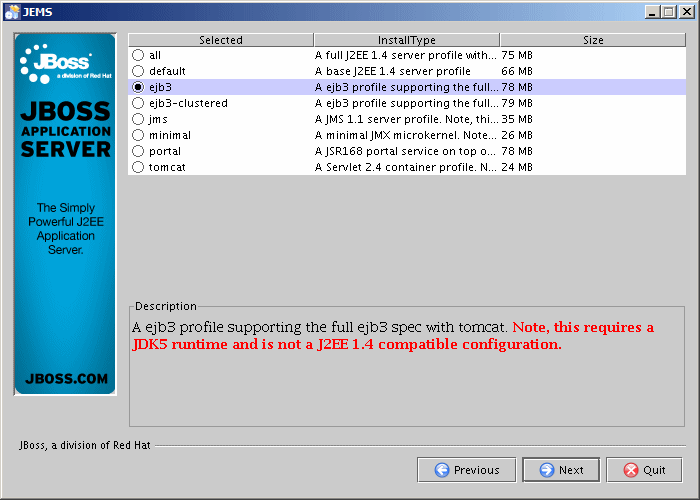
Figure 3: Specify the installation type.
Click Next. On the next dialog, leave all the packs selected and click Next. The dialog that is shown now allows you to select either Standard or Advanced installation. Make sure to click the Advanced radio button. Move to the next dialog by clicking Next. Leave the configuration name as default and click Next.
Now, you've arrived at the DataSource Configuration dialog. Since the goal is to use DB2 as the data repository, click the Configure radio button and, from the Select Database pull-down box, choose DB2-400. This is illustrated in Figure 4.
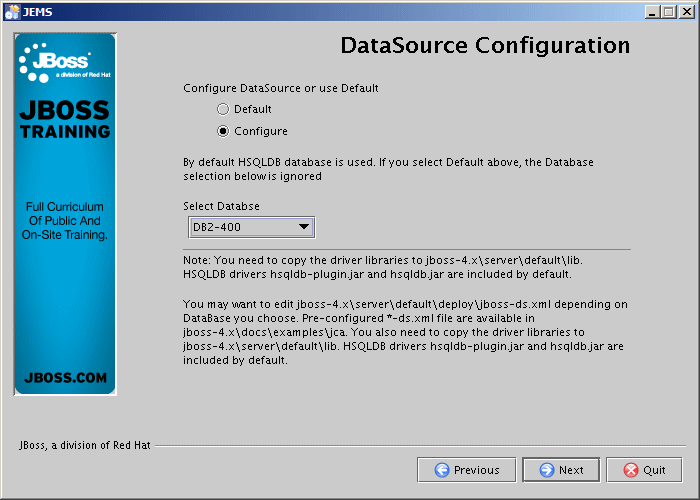
Figure 4: Configure DB2 for i5/OS as the DataSource.
The next dialog is DataSource Configuration. Since the application server will run natively on i5/OS, I recommend, for performance reasons, to use the native (Type 2) JDBC driver rather than the IBM Toolbox driver. Figure 5 shows the necessary changes to configure JBoss with the native driver.
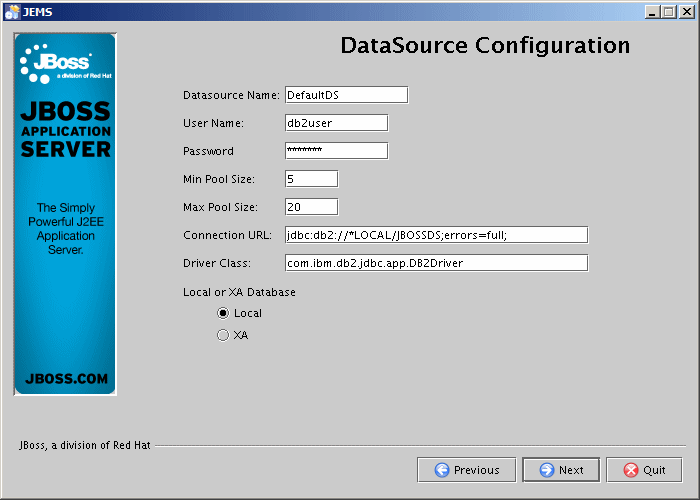
Figure 5: Configure the native DB2 for i5/OS JDBC driver.
Note that the Connection URL contains the reference to the SQL schema that you created in step 3. The Driver Class property points to the DB2Driver class contained in the native JDBC driver. The driver JAR does not need to be copied to the JBoss' lib directory. By default, it is on the JVM classpath, so JBoss will be able to locate and load it. Navigate to the JMS Security dialog by clicking Next twice. Set the password for the JBoss admin and click Next. The Installation Summary that appears lists all the components to be installed. Click Next to kick off the install process. The Installation Progress dialog is shown. When the installation is finished, click Next. Finally, on the last dialog, click Done.
You need to perform just one more small tweak to make the EJB3 component work correctly with DB2. Edit the persistence.properties file located in the /opt/jboss-4.0.5.GA/server/default/deploy/ejb3.deployer/META-INF directory. Find the following line in the properties file:
Uncomment the property and change the dialect to DB2400Dialect. The modified line should look as shown below:
Save the changes.
The JBoss 4.0.5 with EJB3 support is now installed and configured on your System i machine!
Running the Application Server
To run the application server, start the Qshell session and change the directory to /opt/jboss-4.0.5.GA/bin. Type the following command from the QShell prompt:
Watch the messages produced by the JBoss run time. The last message should be similar to the following:
To verify that the application server is working, open a browser on your workstation and use the following URL to connect to the JBoss instance on your System i:
Note: Use your System i host name that you set up in step 2.
The "Welcome to JBoss" Web page should appear.
You can stop the server using the WRKACTJOB command. Find the batch immediate job named QP0ZSPWP with the function set to JVM-org.jboss. Use Option 4 to terminate the job.
A future TechTip will show you how to better integrate JBoss with i5/OS work management. I'll cover topics such as creating the JBoss' own subsystem, creating separate memory pools for the JBoss runtime, creating separate memory pools for the database server jobs, and more....
Deploying the EJB3Trail Sample Application
To deploy the sample application, copy the EJB3Trail.ear file to the following directory on System i:
That's all it takes! Now you can run the application by pointing your browser to the following URL:
The following page appears in your browser:
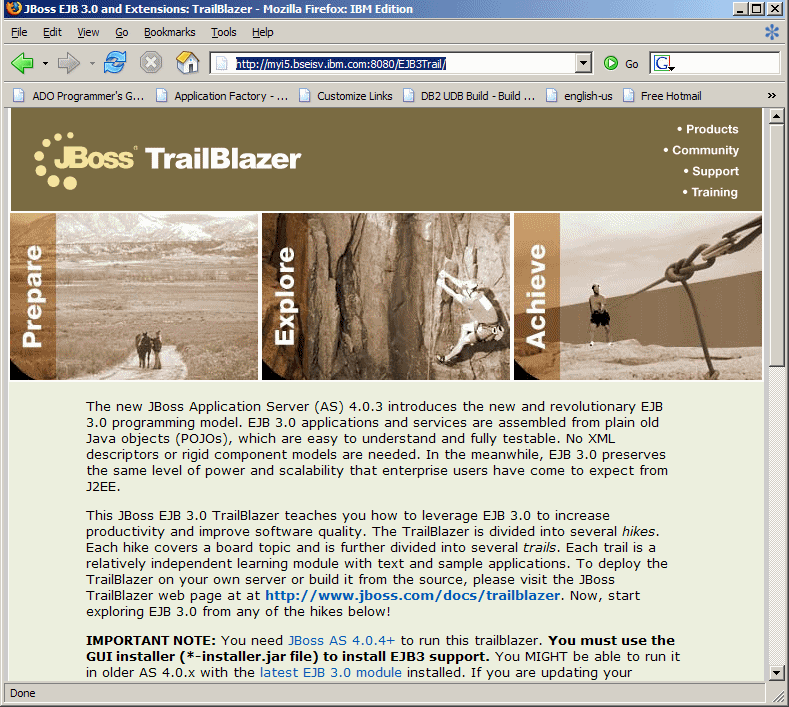
Figure 6: This is the EJB3 Trailblazer sample application.
Start exploring EJB3 by following the tutorial.
Alternatives
I realize that a lot of System i customers use WebSphere as the J2EE-compliant application server. If you are one of them, I have good news to report. You can explore EJB3 via an early release of the EJB3.0 Feature Pack (FEP), which is currently available in alpha. The EJB3 FEP will move to beta and finally will receive production support for EJB3 when it goes to GA later this year.
Additional Material
The JBoss installer and the sample application can be downloaded from the following URL: http://www.jboss.com/products/index
The IBM Technology for Java Virtual Machine in IBM i5/OS ITSO Redbook can be helpful to those who want to learn more about the IBM J9 JVM.
Jarek Miszczyk is the Senior Software Engineer, ISV Solutions Enablement, IBM Rochester. He can be reached by email at


 Business users want new applications now. Market and regulatory pressures require faster application updates and delivery into production. Your IBM i developers may be approaching retirement, and you see no sure way to fill their positions with experienced developers. In addition, you may be caught between maintaining your existing applications and the uncertainty of moving to something new.
 IT managers hoping to find new IBM i talent are discovering that the pool of experienced RPG programmers and operators or administrators with intimate knowledge of the operating system and the applications that run on it is small. This begs the question: How will you manage the platform that supports such a big part of your business? This guide offers strategies and software suggestions to help you plan IT staffing and resources and smooth the transition after your AS/400 talent retires. Read on to learn:
LATEST COMMENTS
MC Press Online