Last month, I discussed the wget utility--one of the many utilities available from the Free Software Foundation's GNU (GNU's Not Unix) project. Those of us who regularly use Linux (or other *nix-like operating systems) are accustomed to powerful tools such as wget. When we find ourselves on a Windows machine, their absence becomes an almost immediate aggravation. Although wget is available as a Windows binary, many of the GNU tools are not. That is, they aren't available unless you use the topic of this month's column: Cygwin. Cygwin is a UNIX-like environment for Windows that's similar in function to what PASE provides for the iSeries. With Cygwin, the Windows user can enjoy many of the same tools as those available to Linux users, including a replacement for the horribly crippled Windows command shell. Developers of *nix-based applications can use Cygwin to port their applications to a Windows platform. The list of packages available for your use includes the aforementioned wget and X server for Windows, as well as editors, compilers, and many other enticing *nix tools.
The Cygwin suite is built as a series of packages. There is the basic environment, which is required to run Cygwin, along with packages that represent the various GNU tools. These can be selected individually or in groups, such as the "development" or "Database" groups. Although this sounds complicated, installing Cygwin is a breeze. The authors have thoughtfully created a Windows-based package installer, which you can access via the home page of Cygwin. Once the installer has been downloaded, it is used to select and install the base package and desired tools. The Package files can be downloaded to the client PC and installed from the resulting local copy, or they can be installed directly via the 'net. Since the entire Cygwin suite can be quite sizeable, it may be to your advantage to download the individual packages if you don't have broadband Internet access, and you can use the local copies to install Cygwin to other machines on your network.
Let's Get Started
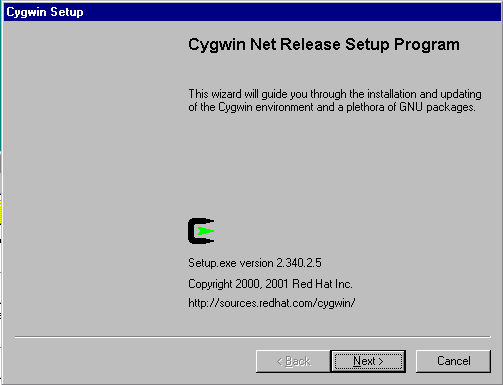
Point your Windows browser to the Cygwin homepage to retrieve the setup program and download it to your local machine. Once it's downloaded, double-click on it to get to the splash screen shown in Figure 1.
Figure 1: The Cygwin network installation program splash screen starts you through the installation process. (Click images to enlarge.)
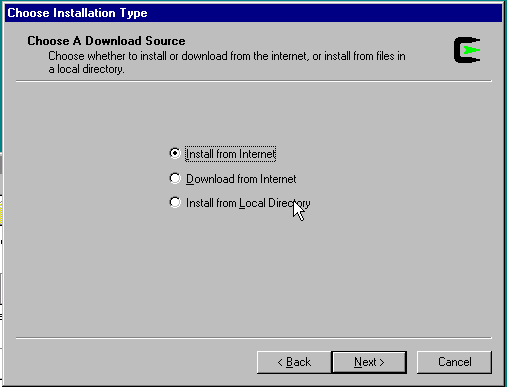
Click on the Next button, which will bring you to the screen shown in Figure 2.
Figure 2: Cygwin can be loaded from the Internet or from a local drive.
Here, you can choose to install directly from the Internet site, download the packages to a local directory (but not install), or install from a local directory. (Obviously, you would not choose the latter unless you have already completed a prior installation and have chosen to download the packages.) Make your choice and click Next to continue.
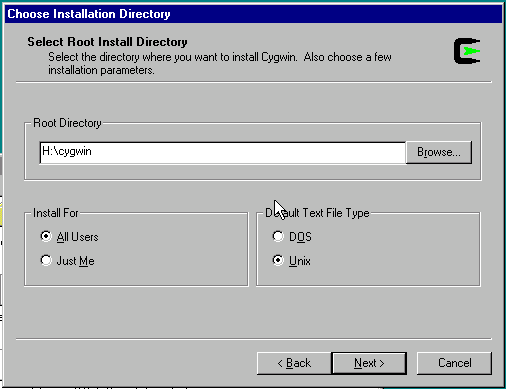
At this point, you'll be asked to select the directory into which you want to install the program, as shown in Figure 3.
Figure 3 caption: The preferred location for Cygwin is "Cygwin" on the drive containing your copy of Windows, in this case drive H.
If you read the FAQ for Cygwin, you'll note that the authors recommend that you choose something other than the root directory of a hard drive. The default given, Cygwin, works well. The default file type option (DOS or UNIX) , determines whether the end-of-line delimiter is the carriage-return plus line-feed combination used in DOS programs or the line-feed used in *nix programs. If you're going to do editing using one of the editors supplied with Cygwin, then you can leave the default to UNIX. If you'll be using Notepad or another Windows editor, choose DOS.
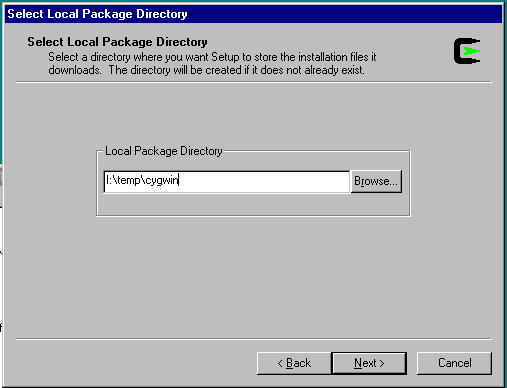
A click on the Next button brings you to the prompt shown in Figure 4.
Figure 4: The packages will be downloaded to the location you specify.
Here, I've chosen to place the files into a directory on a networked drive so that other machines may have access to them via an FTP server. Select an appropriate place for your installation and then click on Next to continue.
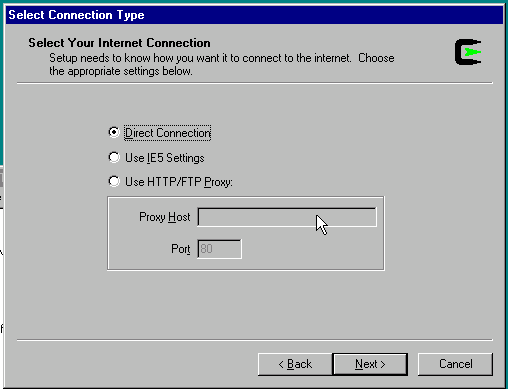
Having defined the environment for the Cygwin installation, we now turn our attention to the network. The next screen (Figure 5) defines the type of Internet connection that you require (e.g., proxy or direct connection).
Figure 5: Specify any special Internet connection needs in this panel.
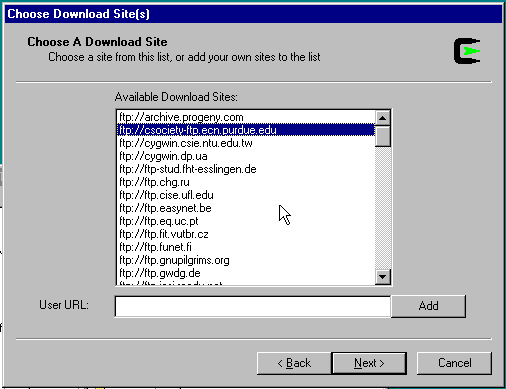
You'll have to determine which of the choices is appropriate for your situation. In my case, a direct connection was adequate. Click on Next, and you'll be given a list (Figure 6) of Cygwin mirrors from which you'll download the actual software. Pick one that you recognize as being relatively close (in Internet terms) to you. I chose a mirror hosted at Purdue University.
Figure 6: Specify the source location, preferably one close geographically to you.
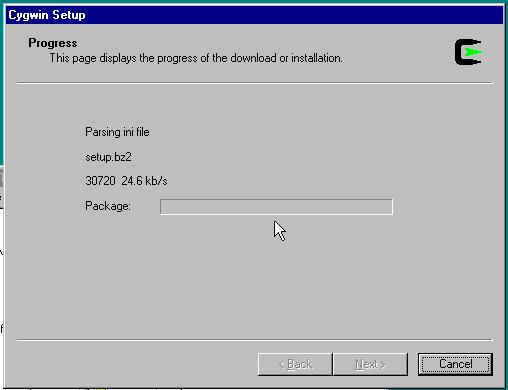
Click on Next, and the setup program will retrieve a list of packages available to you. A status box will be displayed (Figure 7) while this takes place.
Figure 7: This progress display is for the setup package initialization.
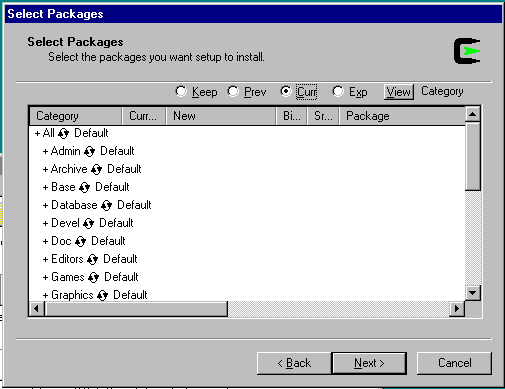
Once that's complete, you'll be presented with a package selection screen, shown in Figure 8.
Figure 8: You can select specific packages in this panel. The default is to load the base installation of Cygwin.
By clicking Next at this point, you will select the base Cygwin installation, complete with a BASH shell and the most basic of *nix tools. Feel free to do this now. You can always rerun the Setup.exe program and add any packages that you need later.
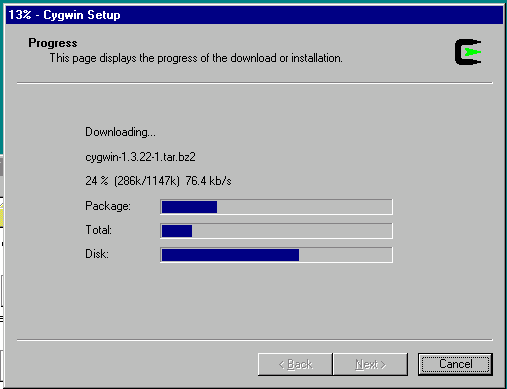
The status screen shown in Figure 9 will display the current state of your installation.
Figure 9 caption: A progress display lets you know how the installation is going.
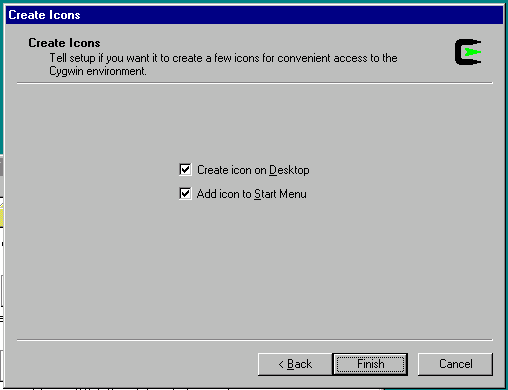
At this point, things will grind away for a while (depending upon your available bandwidth) and the only required actions on your part will be to make a choice about icon creation (Figure 10) and to click Okay to the Installation Complete prompt. That's it! You now have a functional *nix environment on your Windows PC.
Figure 10 caption: The installer will create icons for Cygwin in the locations you select here.
A Quick Orientation
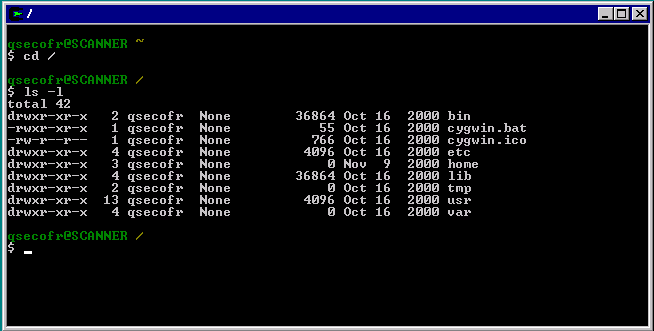
Once the installation is complete, click on "start->cygwin->cygwin bash shell." You are now in a bona fide BASH shell for Windows. If you issue the command pwd (print working directory), you'll note that Cygwin has created a home directory for you and placed you in it. If you issue the commands cd / and ls -l, you'll see the same directories as you'd find on a *nix machine, as shown in Figure 11.
Figure 11: Cygwin's root directory as seen from the BASH command interpreter.
The directory structure of Cygwin requires some explanation, since it can be somewhat disconcerting if you are unable to locate your existing Windows files. Cygwin creates a *nix environment, directory structure included, within the Windows system. In *nix, the slash character (/) represents the root directory. All other directories and files are located under root. The iSeries does the same thing with the Integrated File System (IFS). The root file system is represented by a slash (/), the OS/400 file system is located in /QSYS.LIB, the original shared folders can be found under /QDLS, and so forth. Unlike the iSeries, Cygwin maps its root directory to the folder in which you installed the package (which, in my example, is H:cygwin).
What if you want to traverse the Windows directory tree on your machine? To do this, you'll need to use the special directory /cygdrive, in which you'll find a directory relating to every drive on your system. You'll typically have at least /cygdrive/c (which represents your C drive) and, if you have multiple drives or partitions, you'll find an associated directory under /cygdrive. This is a deviation from the normal way that *nix handles directories, done to completely separate the *nix environment from the Windows environment. It isn't obvious to someone familiar with *nix (or the iSeries IFS), so I mention it to lower your frustration level.
What Next?
Now that you have this wonderful environment, what do you do next? That's entirely up to you. You now have a plethora of new tools available to help you write scripts that are far more powerful than you could ever accomplish with cmd.exe or command.com. Future editions of this column will discuss other GNU tools, and now you can follow along even if you have only Windows at your disposal. Many of the scripts that you write for the Cygwin environment will also work without change in either the iSeries QSH or PASE environments, so now you can have an entirely separate environment in which to develop for your iSeries.
One other thing--don't delete the setup.exe program that you originally downloaded. This program can be used to install additional packages or delete or update existing ones.
Until next time, enjoy your GNU tools.
Barry L. Kline is a consultant and has been developing software on various DEC and IBM midrange platforms for over 20 years. Barry discovered Linux back in the days when it was necessary to download diskette images and source code from the Internet. Since then, he has installed Linux on hundreds of machines, where it functions as servers and workstations in iSeries and Windows networks. He recently co-authored the book Understanding Linux Web Hosting with Don Denoncourt. Barry can be reached at



 Business users want new applications now. Market and regulatory pressures require faster application updates and delivery into production. Your IBM i developers may be approaching retirement, and you see no sure way to fill their positions with experienced developers. In addition, you may be caught between maintaining your existing applications and the uncertainty of moving to something new.
 IT managers hoping to find new IBM i talent are discovering that the pool of experienced RPG programmers and operators or administrators with intimate knowledge of the operating system and the applications that run on it is small. This begs the question: How will you manage the platform that supports such a big part of your business? This guide offers strategies and software suggestions to help you plan IT staffing and resources and smooth the transition after your AS/400 talent retires. Read on to learn:
LATEST COMMENTS
MC Press Online