Just as there's more than one way to skin a cat, there's more than one way to develop mobile apps for the IBM i.
Everywhere you turn these days, people are talking about mobile applications. There is endless chatter about apps for iPads and iPhones, Android-style phones and tablets, and several flavors of BlackBerry, among others. The race is on to get mobile apps built and deployed as quickly as possible. Every time you look up, someone is saying "There's an app for that!"
Maybe that's your cue to get started. You just need to sort out the technical details and build a mobile app for yourself or your company. Timing is everything, right? So let's begin.
Where does the IBM i fit into the fray? Just as important, where do you as an IBM i software developer fit in?
Over the course of two articles, I will provide a solid answer to both questions.
First, let's lay some groundwork. There are two basic approaches used to build mobile applications. One is to build your apps using native development methodologies. Another is to create your apps using an HTML5 type of development approach.
In this article, we're going to build an HTML5 app that runs on the IBM i HTTP Web server. However, having a basic understanding of each approach is imperative to making a good decision about which approach to employ.
Let's take a quick look at both.
Native Development
Native development involves a proprietary development API designed to make the most of the device it was created for.
iPad and iPhone use Object C, which has a significant learning curve. You can read about native iOS development at the iOS Dev Center.
Android uses Java. You can read about Java development for Android here.
BlackBerry uses Java too. Go to the BlackBerry Developer site to read about Java development for BlackBerry.
Although native for Android and BlackBerry both use Java, the APIs are completely different. Each has its own specific Java API, each with its own learning curve.
Advantages of Native Development
Apps written with native code libraries are optimized for the target device.
Native apps are built to be deployed to their respective app store:
- Apple App Store
- Android Marketplace
- BlackBerry App World
Native apps also have direct access to the mobile device's features, such as camera, accelerometer, compass, file system, contacts, storage, geolocation, storage, and push notifications.
Disadvantages of Native Development
If you decide to build a native app and you want to engage audiences from each native platform, you will have to build the app three times.
Three times? Really?
As mentioned, each of the native platforms above (iOS, Android, BlackBerry) have completely separate and unique APIs. That means:
- Three substantial learning curves
- Three development efforts
- Three testing efforts
- Three deployment strategies
- Three maintenance efforts
- Three distinct support burdens
Wow, that's a lot to do!
If you're going to build your app for a single device type, it's easier to consider a native solution.
However, if you want to build your app for multiple devices or if you prefer more of a mobile Web-style look and feel (note: with HTML5 you can achieve a native appearance too!), then an HTML 5 solution is just what you're looking for.
HTML 5
Advantages of HTML5 Development
One app can run on multiple devices.
HTML5 is easier to learn than any of the native solutions.
- One learning curve
- One development effort
- One testing effort
- One deployment strategy
- One maintenance effort
- One support burden
One of the great things about adopting the HTML5 approach to mobile development is that if you have any Web development taking place in your shop, then you already understand at least part of the list above.
Note: All three of the device types mentioned in this article support what is known as the WebKit browser. WebKit is the provider of HTML5 support. Google Chrome and Apple Safari are both built on WebKit, as are the browsers running in iPad, iPhone, Android, and BlackBerry devices.
It's important to note that the HTML5 approach typically employs CSS, JavaScript, and of course HTML5, staples of a typical Web development setting.
Your deployment target (WebKit) is also your debugging platform. Google Chrome and Apple Safari have excellent debugging support, including all of the things that you know and love about the green-screen debugger and more!
It's easier to roll out changes to a Web-style app than it is to make changes and redeploy a native-style app. With HTML5, you simply push your changes to production. The next time your users run the app, they have your revisions.
All of the benefits of building a native app—including access to device internals (camera, accelerometer, compass, file system, contacts, storage, geolocation, and push notifications) and deploying to the various app stores—are available through a technology called PhoneGap (I'll address this in Part II of this article).
Disadvantages of HTML5 Development
The biggest knock against the HTML5 approach is performance. Native code is compiled to optimize apps built for a given device, producing more efficient, faster code. While this is true, the real issue with performance for any communications-related application is in the way that data is moved between the client and the server. So whether you're writing a native app or an HTML5 app, you need to be mindful of how much data you're sending and receiving and the impact that has on overall response time.
Given the many advantages of using HTML5, plus the huge and growing community of HTML5 mobile developers, HTML5 technology for mobile has reached a level of acceptance that makes it a great choice.
As mentioned above, in this article we're going to build an app using the HTML5 approach. Also, we will use the IBM i.
In any Web development environment, there are two distinct components that you need to be aware of:
- The Web server—For the IBM i, the HTTP Web server is installed by default and is free. We'll use Valence 3.1 from CNX Corporation to provide RPG support for our mobile application. More info below.
- The browser—For mobile use, the browser comes with the mobile device. All the modern mobile browsers support HTML5 through the use of WebKit. We'll use Google Chrome to test our app on the PC. We'll also use Sencha Touch 2 from Sencha as the JavaScript library for our sample project. More info below.
Software Tools
All of the software tools needed for this article are available free. In order to build the app accompanying this article, you should download them now:
Google Chrome
Google Chrome is for testing and debugging your app on your PC. You may have it already. If not, download it.
Google Chrome is simply the best HTML5 browser available for testing mobile apps on your desktop. It has excellent debugging support and very closely emulates the browser running on your mobile device.
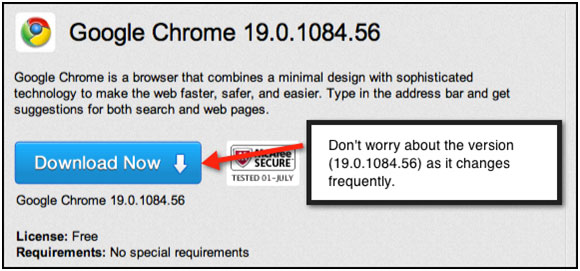
Figure 1: Download Google Chrome.
Sencha Touch 2
Sencha Touch 2 is the front-end of your application (the screens for your mobile app). This free JavaScript library has captured considerable market share and momentum in the mobile application development world. We'll use it to build the mobile app portion (front-end) of our application. There are several JavaScript libraries in the mobile application development market, but I've found the Sencha library to be the most complete and well-thought-out mobile development platform available.
Sencha Touch 2 will be downloaded below as part of the Valence tool, which you will download next.
You will need to download Sencha Touch 2 directly only if you are going to build mobile apps that don't involve RPG or Valence. For instance, if your Web-based language of choice is Java, PHP, C#, or any other non-RPG language, you can download it directly from this link. Otherwise, just download Valence in the next step and you'll be all set.
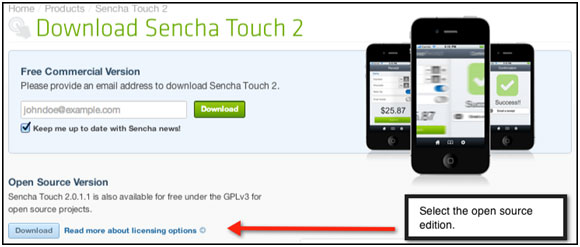
Figure 2: Download Sencha Touch 2.
Valence for IBM i
Valence for IBM i provides a portal into which desktop Web apps and mobile Web apps can be deployed. Valence is an IBM i-centric Web development platform that supports both desktop and mobile app development. Valence also provides an easy-to-use RPG API to support Web apps (both desktop and mobile) as well as built-in support for Sencha's Ext JS desktop browser apps and Sencha Touch 2's mobile browser apps. Download the free community edition!

Figure 3: Download Valence.
Valence installs on your IBM i in just a few minutes and requires no effort to set up. Run the installation process. It will guide you through the installation steps. Once Valence is installed, point your Google Chrome browser to your IBM i using one of these URLs:
http://yourIP/valence/vvlogin.pgm
or
http://yourIBMiname/valence/vvlogin.pgm
Valence supports desktop login and mobile (touch) login. If you log in from your desktop browser, Valence will default to a desktop view. You can see what "touch" view looks like via this URL:
http://yourIBMiname/valence/vvlogin.pgm?display=touch
Here is a mile-high view of how the downloaded pieces relate to each other:
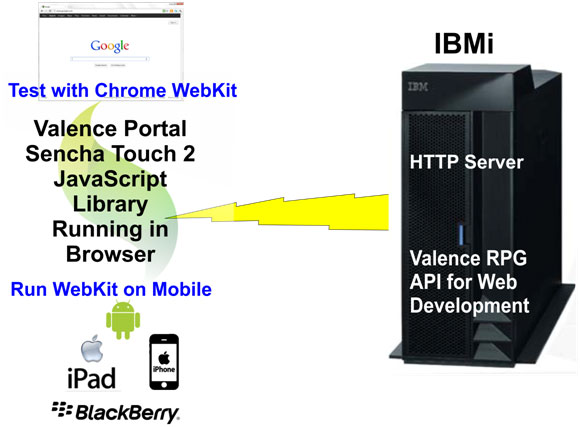
Figure 4: All the pieces work together.
Here's how the different pieces lay out on your IBMi.
The Valence Portal is located on your IFS at /valence-3.1.
Sencha Touch 2 is located on your IFS at /valence-3.1/sencha-touch-2.0.0.
The files for the customer map app (custmapapp.html and custmapapp.js) will be stored at /valence-3.1/mcpress. (You'll create the mcpress folder later.)
The RPG source for CUSTMAPR will be located at VALENCE31/QRPGLESRC.
The RPG portion of Valence is stored in the Valence31 library.
OK, now that you have everything downloaded and you know how the pieces fit together, let's take a look at the customer map app that we're going to build.
Here's the flow of the app:
1. When the app starts, a list of customers is displayed on the mobile device.
2. The user taps one of the customers.
3. The customer's address is displayed.
4. In addition to the customer address, a map of the area that the customer is located in is displayed.
5. A back button can be used to return to the customer list.
This simple app illustrates a number of common functions that are typical of a touch-based app. We have a list (think subfile), we have a detail screen, and we have a Google map component.
Let's take a look at the screenshots:
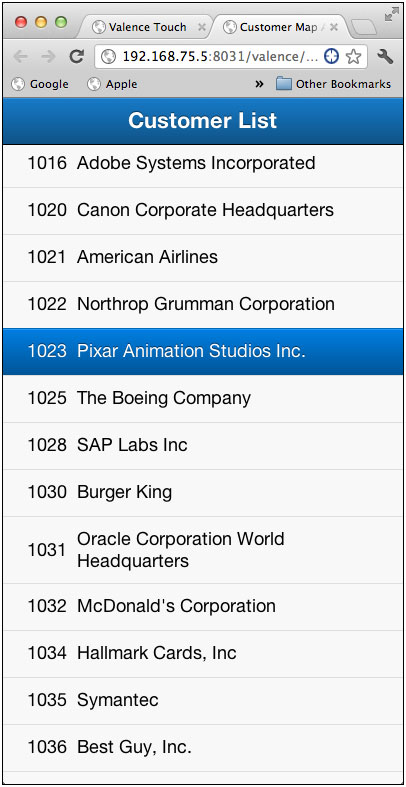
Figure 5: Here's our customer list.
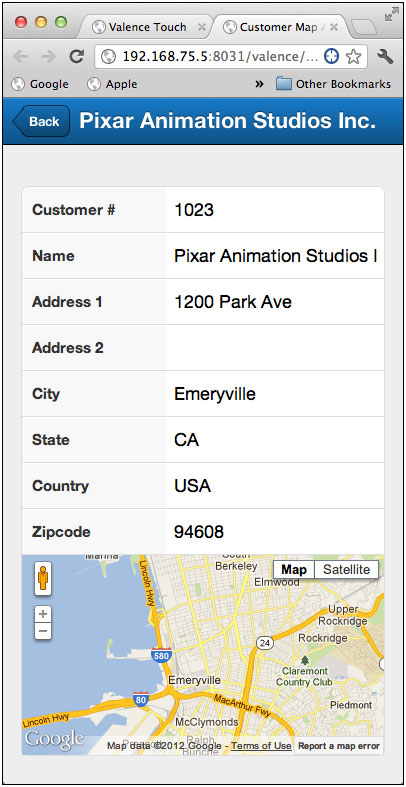
Figure 6: A customer has been selected.
Stay Tuned
There you go! Now you know the basics of how to start. In Part II of this article series, we'll pick up where we left off.


 Business users want new applications now. Market and regulatory pressures require faster application updates and delivery into production. Your IBM i developers may be approaching retirement, and you see no sure way to fill their positions with experienced developers. In addition, you may be caught between maintaining your existing applications and the uncertainty of moving to something new.
 IT managers hoping to find new IBM i talent are discovering that the pool of experienced RPG programmers and operators or administrators with intimate knowledge of the operating system and the applications that run on it is small. This begs the question: How will you manage the platform that supports such a big part of your business? This guide offers strategies and software suggestions to help you plan IT staffing and resources and smooth the transition after your AS/400 talent retires. Read on to learn:
LATEST COMMENTS
MC Press Online